The component macro
To simplify the implementation of the Component trait, let's use the relm4-macros crate!
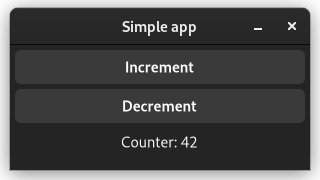
The app will look and behave identically to our first app from the previous chapter. Only the implementation is different.
The app we will write in this chapter is also available here. Run
cargo run --example simplefrom the example directory if you want to see the code in action.
What's different
The component macro will simplify creating the Widgets struct. The update code remains untouched, so we can reuse most of the code from the previous chapter.
Let's have a look at how to define a component with the macro and go through the code step by step:
#[relm4::component]
impl SimpleComponent for AppModel {
    type Init = u8;

    type Input = AppMsg;
    type Output = ();

    view! {
        gtk::Window {
            set_title: Some("Simple app"),
            set_default_width: 300,
            set_default_height: 100,

            gtk::Box {
                set_orientation: gtk::Orientation::Vertical,
                set_spacing: 5,
                set_margin_all: 5,

                gtk::Button {
                    set_label: "Increment",
                    connect_clicked => AppMsg::Increment
                },

                gtk::Button::with_label("Decrement") {
                    connect_clicked => AppMsg::Decrement
                },

                gtk::Label {
                    #[watch]
                    set_label: &format!("Counter: {}", model.counter),
                    set_margin_all: 5,
                }
            }
        }
    }

    // Initialize the UI.
    fn init(
        counter: Self::Init,
        root: Self::Root,
        sender: ComponentSender<Self>,
    ) -> ComponentParts<Self> {
        let model = AppModel { counter };

        // Insert the macro code generation here
        let widgets = view_output!();

        ComponentParts { model, widgets }
    }

    fn update(&mut self, msg: Self::Input, _sender: ComponentSender<Self>) {
        match msg {
            AppMsg::Increment => {
                self.counter = self.counter.wrapping_add(1);
            }
            AppMsg::Decrement => {
                self.counter = self.counter.wrapping_sub(1);
            }
        }
    }
}
The associated types don't change. We still have to define the model, the input parameters, and the message types. However, the Widgets type is never explicitly defined in the code, but generated by the macro.
And then... wait, where do we define the Root type? Actually, the macro knows that the outermost widget becomes automatically the root widget.
Next up - the heart of the component macro - the nested view! macro. Here, we can easily define widgets and assign properties to them.
Properties
As you see, we start with the gtk::Window which is our root. Then we open up brackets and assign properties to the window. There's not much magic here but actually set_title is a method provided by gtk4-rs. So technically, the macro creates code like this:
window.set_title(Some("Simple app"));Widgets
We assign a child to the window by nesting another widget inside it. Widgets may be nested indefinitely:
gtk::Box {Sometimes we want to use a constructor function to initialize our widgets. For the second button we used the gtk::Button::with_label function. This function returns a new button with the "Decrement" label already set, so we don't have to call set_label afterwards.
gtk::Button::with_label("Decrement") {Events
To connect events, we use this general syntax:
method_name[cloned_var1, cloned_var2, ...] => move |args, ...| { code... }Again, there's no magic. The macro will simply assign a closure to a method. Because closures often need to capture local variables that don't implement the Copy trait, we need to clone these variables. Therefore, we can list the variables we want to clone in the square brackets after the method name.
For simple cases there's even a shorter syntax for just sending one input message that works with most event handlers. So instead of this:
method_name[sender] => move |_| { sender.input(Msg); },You can simply write this:
method_name => Msg,This is what we used in this example:
connect_clicked => AppMsg::DecrementUI updates
The last special syntax of the component macro we'll cover here is the #[watch] attribute. It's just like the normal initialization except that it also updates the property in the view function. Without it, the counter label would never be updated.
                    #[watch]
                    set_label: &format!("Counter: {}", model.counter),
The full reference for the syntax of the widget macro can be found here.
Constructing the Widgets
After we've defined our widgets, we need to construct them. This is done with the view_output! macro, which returns a fully-initialized instance of our Widgets struct.
        // Insert the macro code generation here
        let widgets = view_output!();
The complete code
Let's review our code in one piece one more time to see how all these parts work together:
use gtk::prelude::{BoxExt, ButtonExt, GtkWindowExt, OrientableExt};
use relm4::{gtk, ComponentParts, ComponentSender, RelmApp, RelmWidgetExt, SimpleComponent};

struct AppModel {
    counter: u8,
}

#[derive(Debug)]
enum AppMsg {
    Increment,
    Decrement,
}

#[relm4::component]
impl SimpleComponent for AppModel {
    type Init = u8;

    type Input = AppMsg;
    type Output = ();

    view! {
        gtk::Window {
            set_title: Some("Simple app"),
            set_default_width: 300,
            set_default_height: 100,

            gtk::Box {
                set_orientation: gtk::Orientation::Vertical,
                set_spacing: 5,
                set_margin_all: 5,

                gtk::Button {
                    set_label: "Increment",
                    connect_clicked => AppMsg::Increment
                },

                gtk::Button::with_label("Decrement") {
                    connect_clicked => AppMsg::Decrement
                },

                gtk::Label {
                    #[watch]
                    set_label: &format!("Counter: {}", model.counter),
                    set_margin_all: 5,
                }
            }
        }
    }

    // Initialize the UI.
    fn init(
        counter: Self::Init,
        root: Self::Root,
        sender: ComponentSender<Self>,
    ) -> ComponentParts<Self> {
        let model = AppModel { counter };

        // Insert the macro code generation here
        let widgets = view_output!();

        ComponentParts { model, widgets }
    }

    fn update(&mut self, msg: Self::Input, _sender: ComponentSender<Self>) {
        match msg {
            AppMsg::Increment => {
                self.counter = self.counter.wrapping_add(1);
            }
            AppMsg::Decrement => {
                self.counter = self.counter.wrapping_sub(1);
            }
        }
    }
}

fn main() {
    let app = RelmApp::new("relm4.test.simple");
    app.run::<AppModel>(0);
}